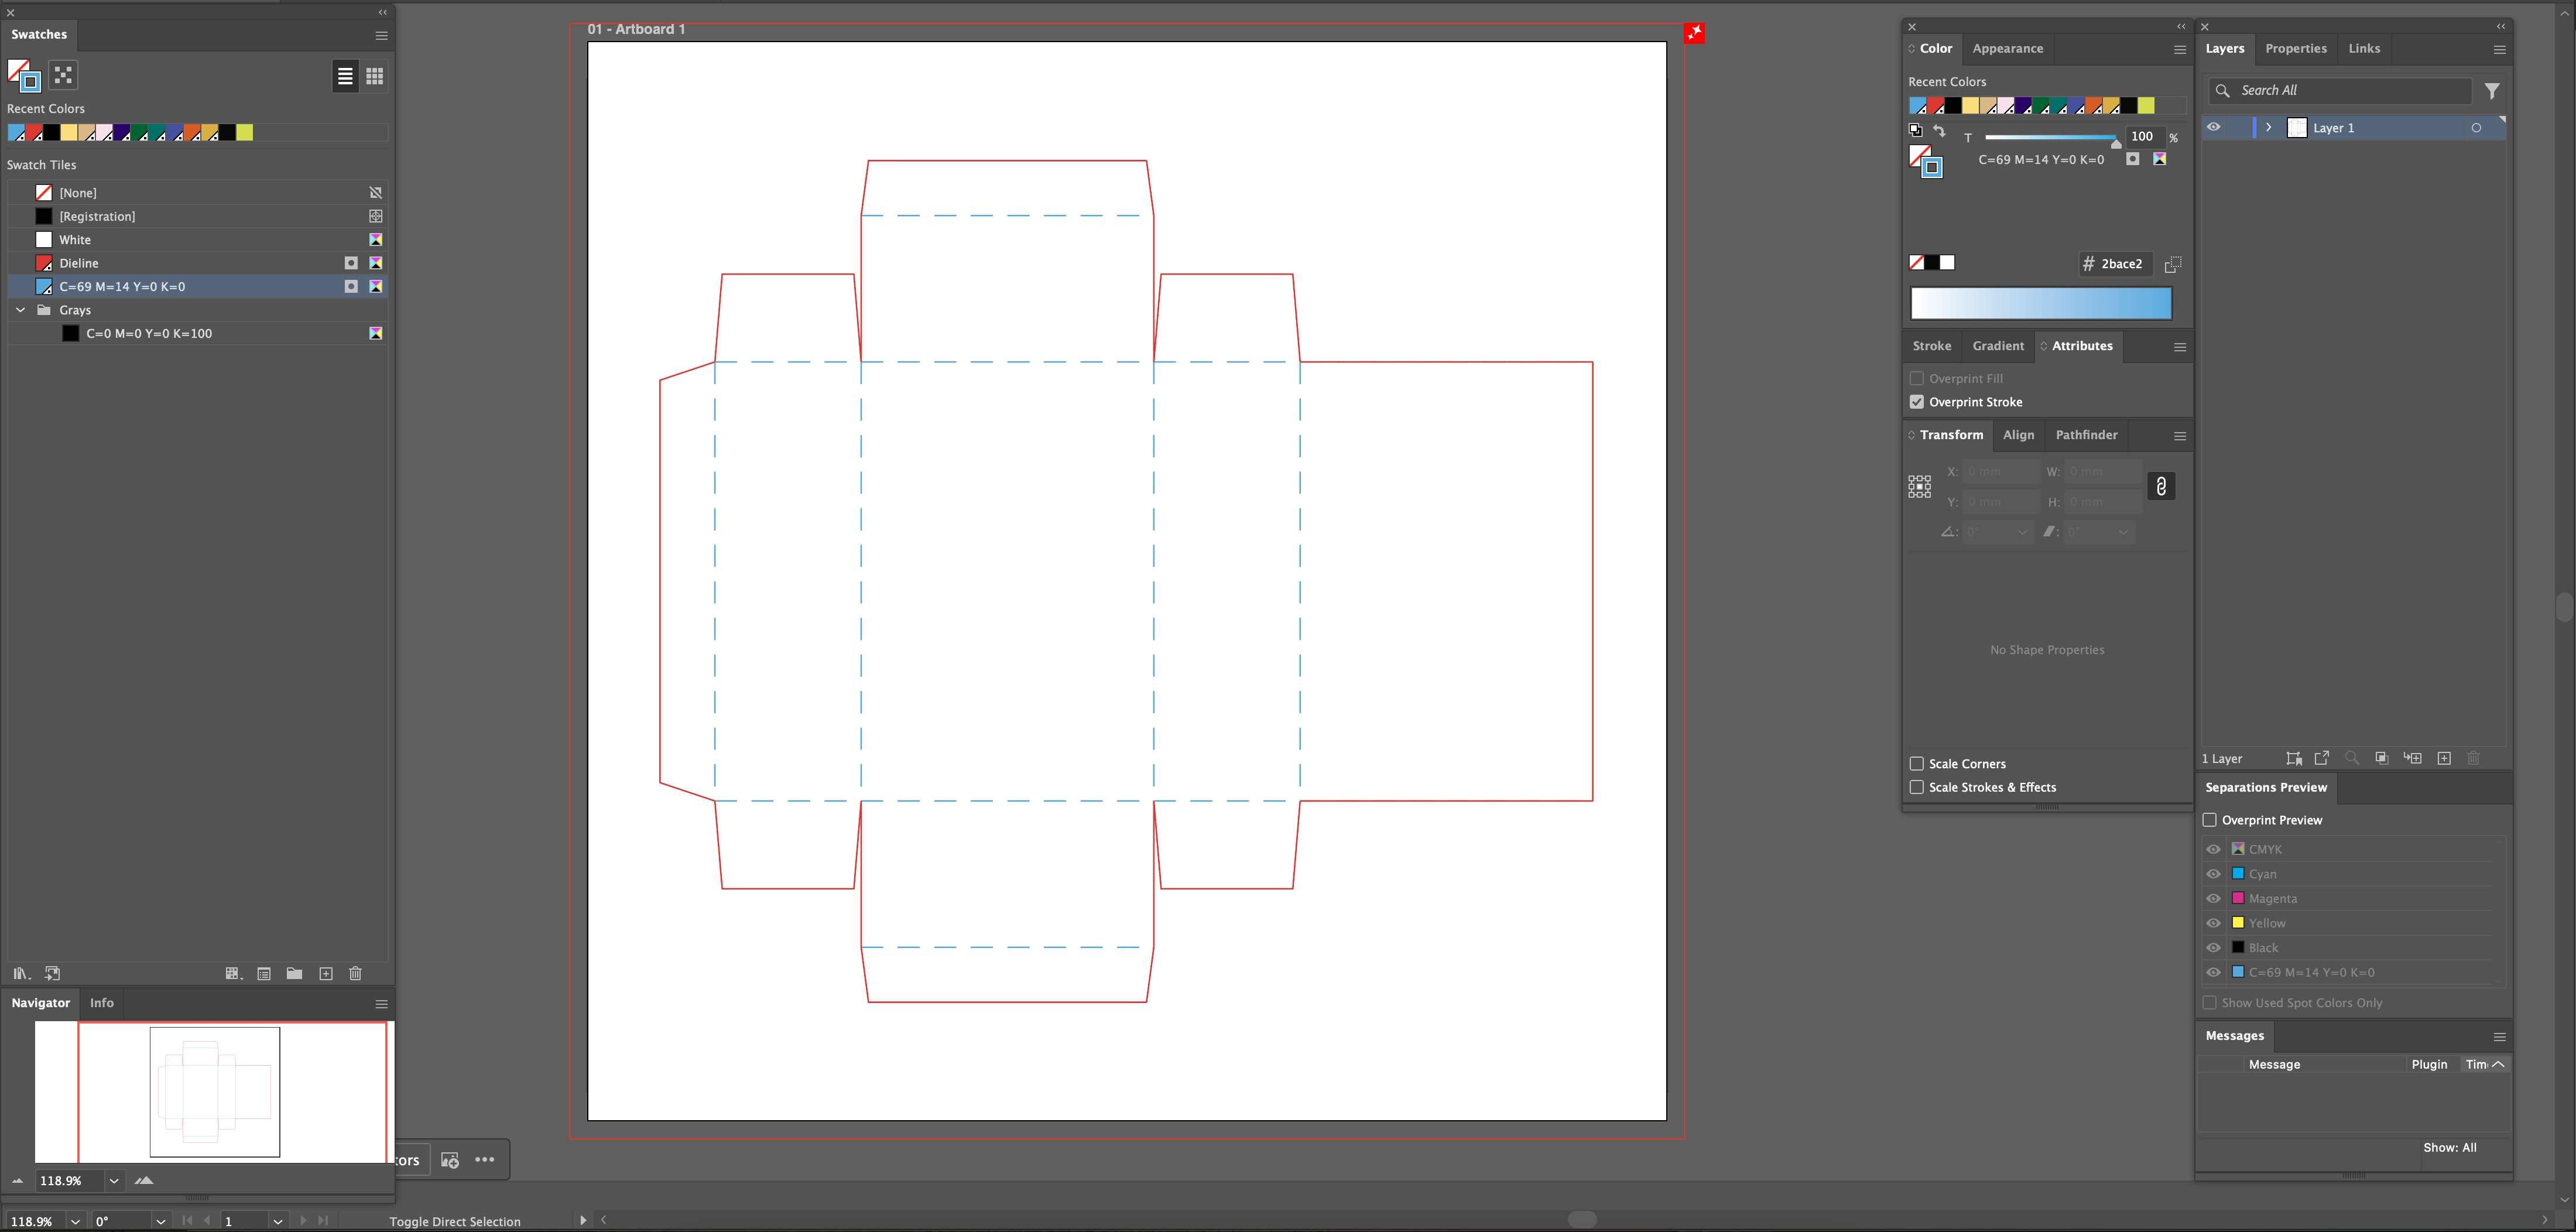
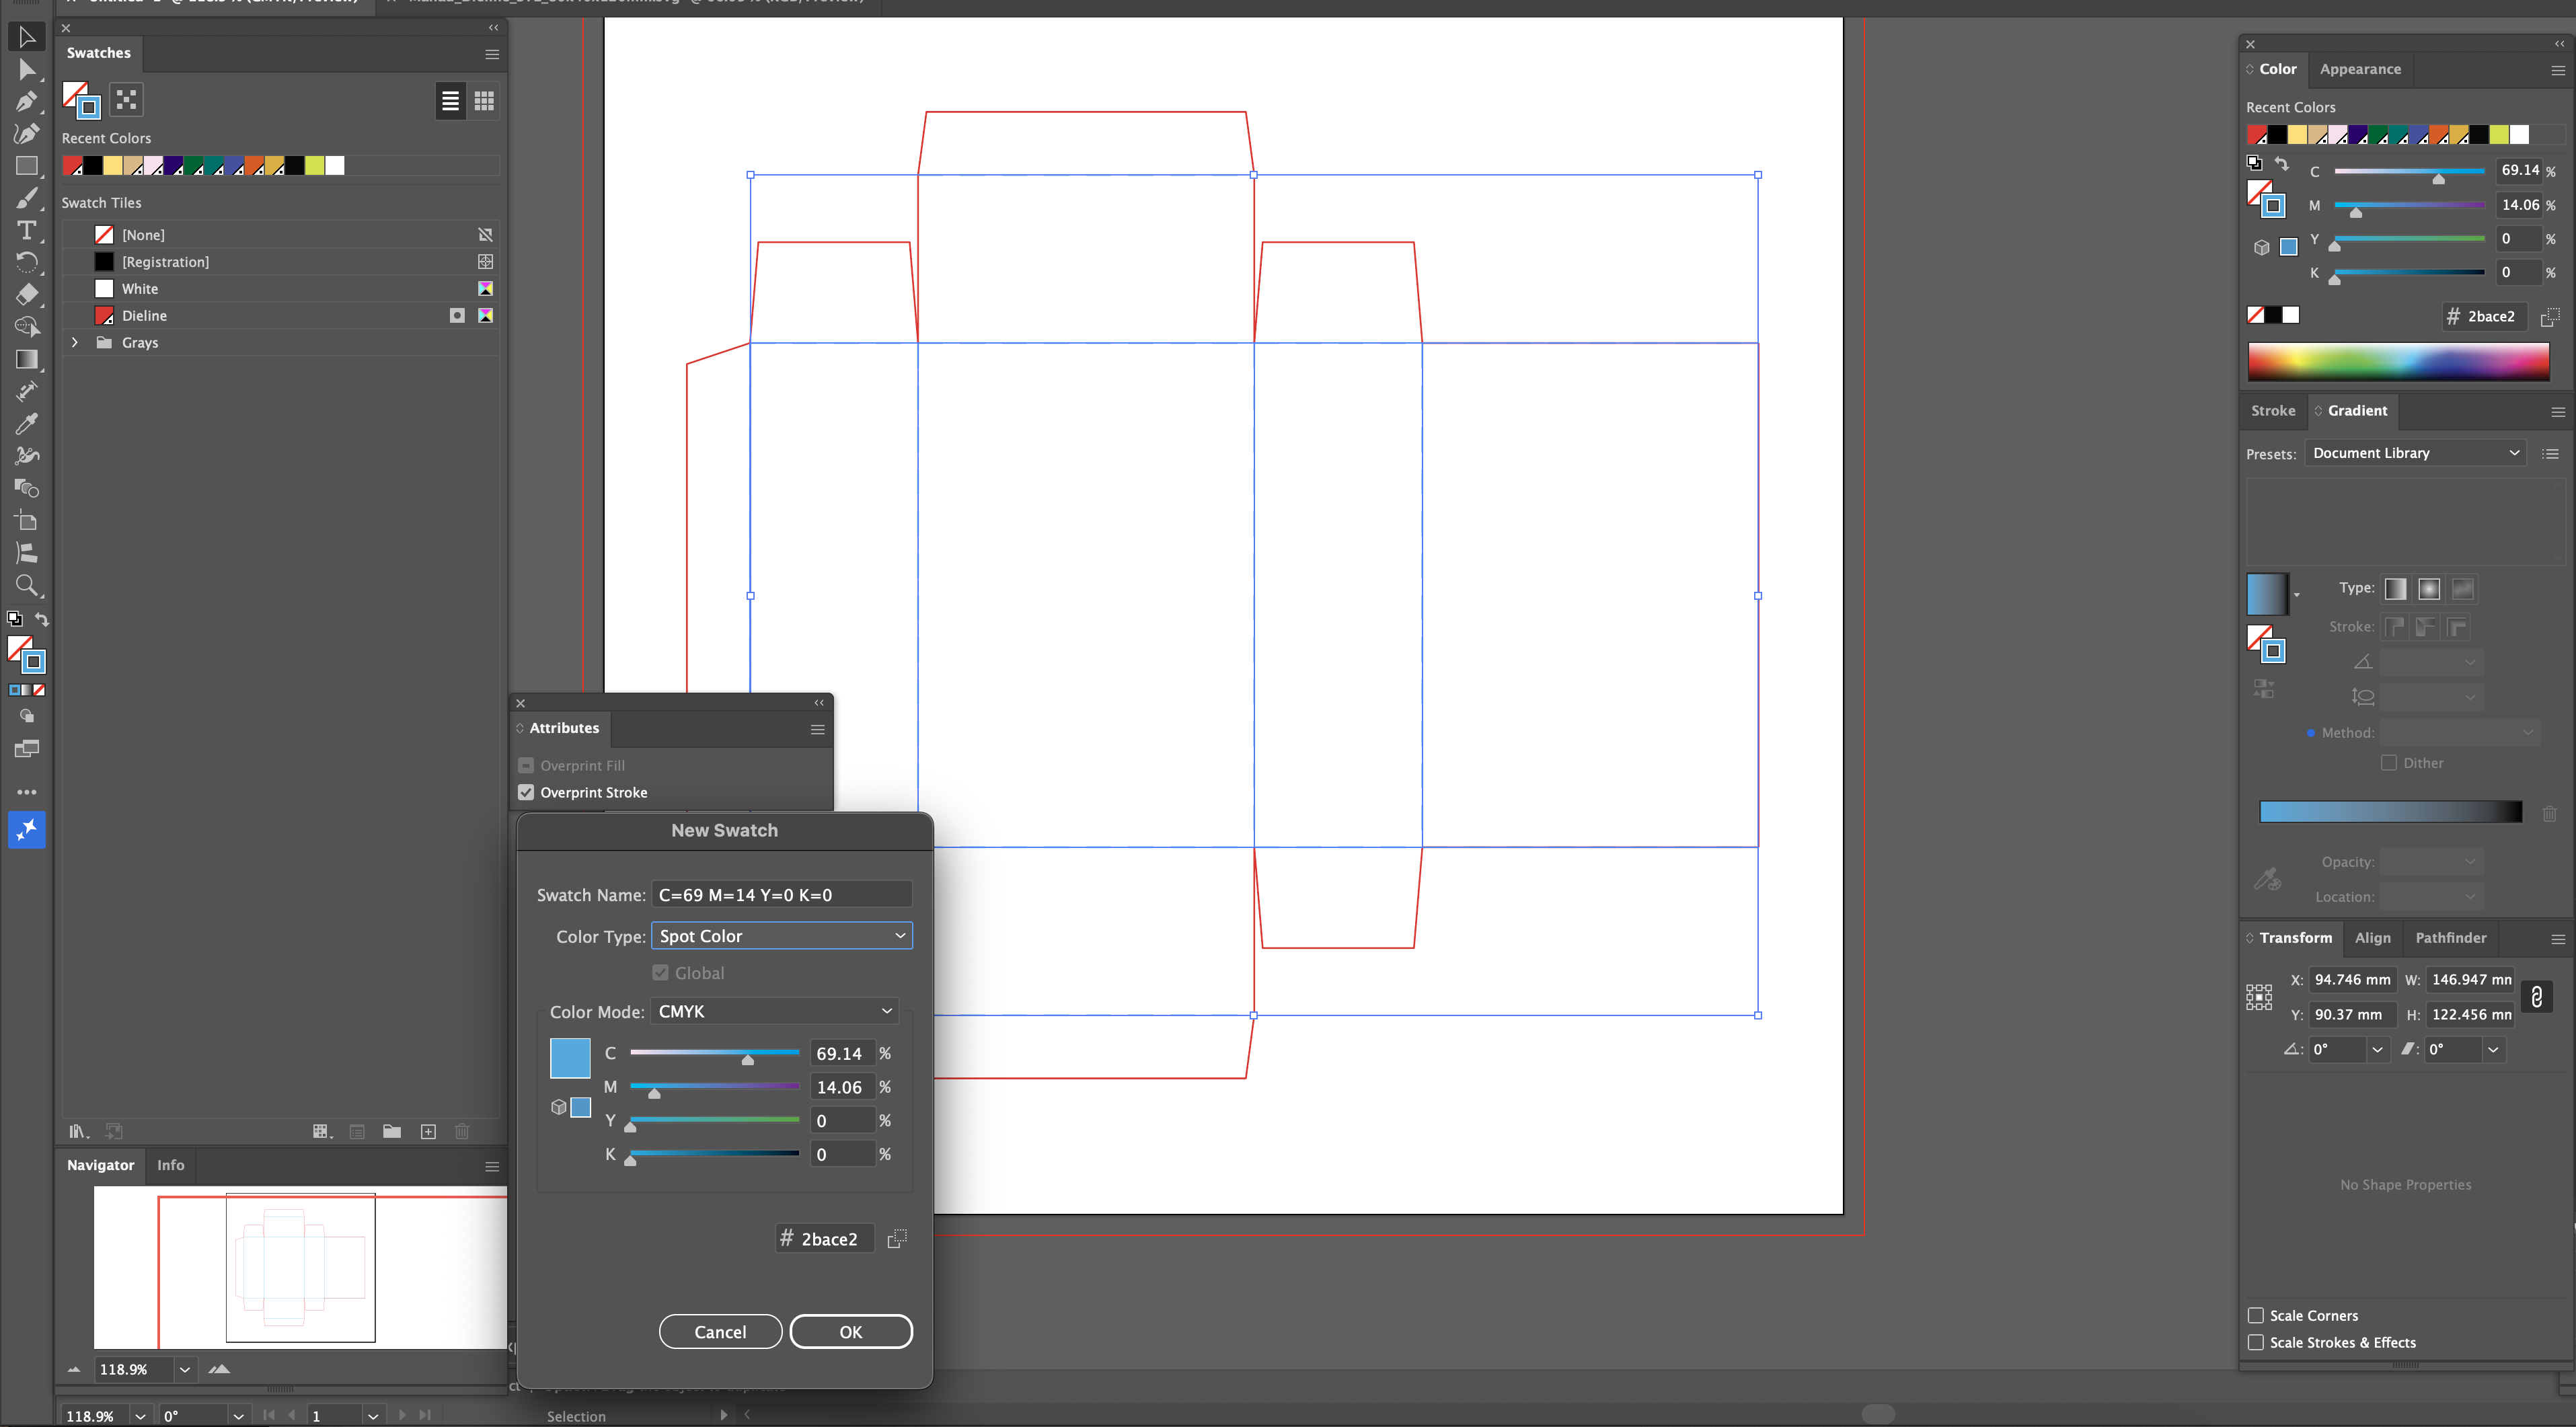
How to create a dieline: To create a packaging dieline in Adobe Illustrator, start by creating a dedicated top layer. Draw your outer box dimensions using a solid colored line (for the cut blade), and draw your internal dimensions using dashed lines (for the folds/creases). You must convert your stroke color to a custom Spot Color and enable "Overprint Stroke" so the template does not accidentally print on the final physical product.
Creating a dieline manually in Adobe Illustrator can be incredibly time-consuming and confusing, especially for beginners. Trying to calculate complex structural geometry, exact glue flap angles, and paperboard thickness compensation often leads to catastrophic—and extremely expensive—printing errors on the press.
In this guide, you will learn the exact step-by-step method professional prepress engineers use to build structural templates in Adobe Illustrator. But more importantly, we will show you how to skip the math entirely. Instead of creating dielines manually, you can also use our free dieline generator to build print-ready templates instantly.
What is a Dieline in Packaging Design?
A dieline is a flat, 2-dimensional vector template that acts as a structural blueprint for a 3-dimensional package. It tells the heavy machinery at a commercial printing facility exactly where to cut, crease, perforate, and glue the printed paperboard so it can be assembled into a functional box.
Dielines are absolutely critical in modern commercial printing. Without a mathematically precise template, your artwork will misalign, the box flaps will crash into each other when folded, and the final product will be rejected by the retail store.
The Challenges of Creating Dielines Manually
While drawing a custom structural template from scratch gives you total control, it comes with massive risks. If you are not a trained structural engineer, manual drafting is:
- Extremely Time-Consuming: Mapping out perfectly symmetrical panels takes hours of meticulous vector drafting.
- Requires Technical Precision: A beginner designer who forgets to calculate the physical thickness of a 24pt paperboard will accidentally design a box that physically cannot close, as the inner dust flaps will crash into the outer panels.
- Easy to Make Costly Mistakes: If your bleed isn't set perfectly against your cut line, the printer will reject the file, causing massive production delays.
Use a Dieline Generator (The Faster Method)
Instead of creating complex dielines from scratch and worrying about paper thickness clearances, you can generate a mathematically perfect template instantly. Enter your exact Width, Height, and Depth into our free tool and download a print-ready SVG template in seconds.
Launch Free Dieline Generator ↗How to Create a Dieline in Illustrator (Manual Method)
If your project requires a highly bespoke, custom-shaped window or an origami-style folding mechanism, you must build it manually. It is imperative that you follow strict prepress industry standards.
Step 1: Set Up the Document Correctly
Begin by creating a new document in Adobe Illustrator. Ensure your Color Mode is strictly set to CMYK. You must also define your Bleed settings in the document setup. The global industry standard for packaging bleed is 3mm (or 0.125 inches) on all four sides.
Step 2: Draw the Layout Structure
Using the Rectangle Tool (M), begin drawing the main panels of your box. You must account for the Front, Back, Top, Bottom, and the two Side panels. This requires extreme mathematical precision—if the Front panel is 100mm wide, the Top panel must also be exactly 100mm wide so the box closes perfectly. You must also manually draw the dust flaps and the side glue flap.
Step 3: Apply Technical Line Styles
To communicate with the mechanical die-cutting machine, you must differentiate your lines:
- Cut Lines (Solid): The outermost boundary of your box. This tells the sharp steel blade to slice entirely through the paper.
- Fold Lines (Dashed): The internal panel dividers. This tells the blunt creasing matrix to crush the paper fibers so the box can bend. Open your Stroke Panel and check the "Dashed Line" box to visually separate these.
Step 4: Create a Spot Color and Overprint (CRITICAL)
Your dieline cannot be made of standard CMYK black or red ink, or the press will print it as part of your artwork. You must convert the stroke color to a Spot Color.
- Open the Swatches panel, click "New Swatch", and name it exactly "Dieline" or "Cutter".
- Change the Color Type to Spot Color.
- Select all your dieline paths, open the Attributes Panel (Window > Attributes), and check Overprint Stroke. This renders the dieline invisible to the ink rollers, ensuring it only functions as a mechanical guide.
Pro Tips from a Packaging Designer
As a professional prepress executive, I reject dozens of files a week because designers fail to follow standard layer hygiene. To ensure your files are loved by commercial printers, follow these strict rules:
- Always keep your dieline on a separate layer: Lock the dieline layer at the very top of your document. Never merge it with your artwork graphics.
- Use 100% Magenta Spot Color: Make your dieline stroke a visually aggressive color so it stands out against your artwork, making it easy for the plate-maker to identify.
- Label Folds Clearly: If your packaging has complex perforations or tear-away strips, use a text callout outside the bleed area to explain the mechanical action to the printer.
- Watch your TAC limits: Ensure the rich black backgrounds touching your dieline don't exceed ink density limits. Use a TAC Ink Calculator to be safe.
Frequently Asked Questions
What is a dieline template?
A dieline template is a 2D vector graphic that acts as a blueprint for a 3D package. It uses solid and dashed lines to tell commercial printers exactly where to cut and fold the paperboard.
What software is used for dielines?
Adobe Illustrator is the industry standard for creating dielines because it produces the mathematically precise vector paths (SVG, EPS, AI) required by laser die-cutting machines. Photoshop cannot be used.
What is bleed in packaging?
Bleed is the artwork that extends past the physical cut line of the dieline. You must include 3mm of bleed so that if the mechanical cutting blade shifts slightly, there are no unprinted white edges on your box.
Ready to skip the manual work? Try our free dieline generator to save hours of design time and avoid costly production errors.